

dsh command) is an open-source AI agent from DeepSeek with a web UI (MIT license). It writes and reads files, runs terminal commands and works a task through to the end — much like Claude Code, but in the browser.
Through RuAPI, dsh can use deepseek-flash, Claude, GPT and other models with a single key, and you can pay in crypto (USDT) without a foreign bank card. A short overview is on www.ruapi.ai/deepseek-harness-v-rossii.
The built-in DeepSeek card in dsh does not work with RuAPI: it talks to DeepSeek’s own endpoint and uses file uploads (
/v1/files), which RuAPI does not offer. Connect RuAPI through Custom model API as shown below.What you need
1
A RuAPI key
Console → API keys → create a key
sk-.... Right after sign-up you can use the trial models deepseek-flash, claude-haiku-5-5 and gpt-6-luna.2
Node.js 24.9 or newer
Check the version:You need
v24.9.0 or later. If it is older or the command is not found, install Node.js as described below.3
An empty working folder
For example
dsh-test. dsh will create and change files there.Install Node.js
You need 24.9 or newer. We tested on Node.js 24; the version currently marked LTS on the nodejs.org download page is 26 — it meets dsh’s requirement too, but we haven’t tested it separately. Take the one marked LTS.npm and npx come with Node.js — no separate install needed.
- Windows
- macOS
- Linux (Ubuntu / Debian)
- Download the Windows Installer (.msi) from the nodejs.org download page (x64 for most computers).
- Run it and click Next; the defaults are fine.
- Close and reopen your terminal (PowerShell or Command Prompt), otherwise it won’t see Node.js.
winget is available):Y.node -v should show v24.9.0 or later; npx -v just prints a version number (e.g. 11.19.1), which means npx is in place.
Step 1. Start dsh
In a terminal, create an empty folder, go into it and start dsh:y. The npm warn deprecated node-domexception warning is harmless.
dsh opens your browser at http://127.0.0.1:3080.
dsh on a remote server (no graphical desktop)
dsh on a remote server (no graphical desktop)
Connect to the server with port forwarding (replace In the same window, start dsh without opening a browser:Keep the window open and, on your own computer, open the token line dsh printed in your browser. Better run dsh as a regular user rather than
user@server with your login and server address):root, so the agent has fewer rights on the server.Step 2. First launch
- A preview notice appears — close it with the button at the bottom of the window.
- Pick a workspace: click the folder selector above the input box, choose your folder (for example
dsh-test) and click Open. Until a folder is chosen, dsh shows a message that it could not create a default workspace. - dsh picks the interface language from your browser. To change it: More (bottom left) → Settings → General → Language. Russian, Chinese and several other languages are available.
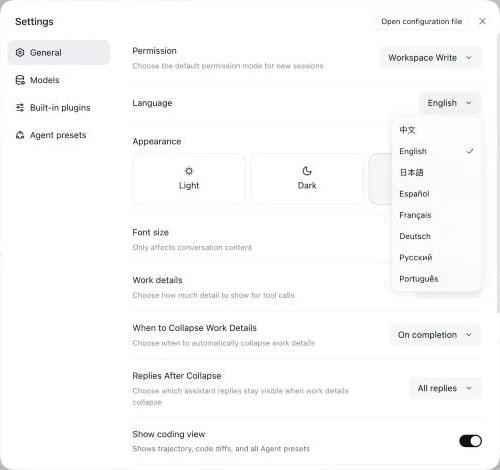
Step 3. Connect RuAPI
More → Settings → Models → Add model provider → Custom model API tab.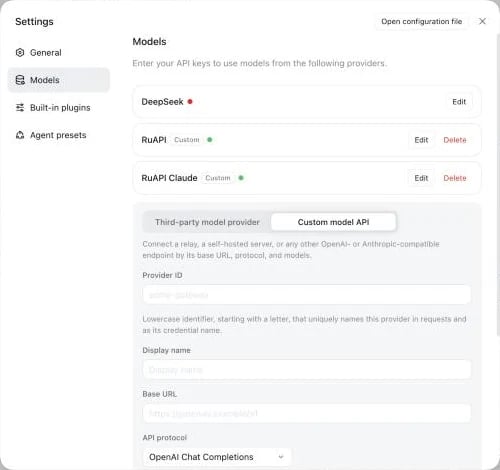
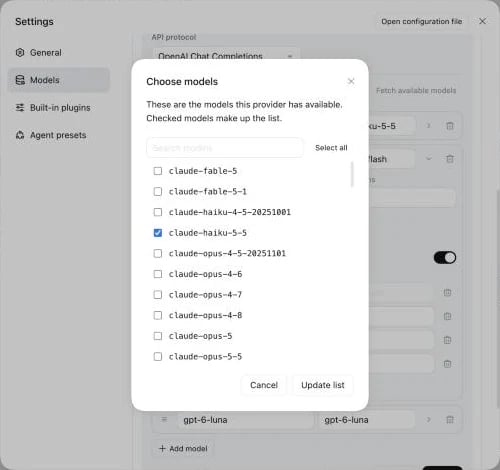
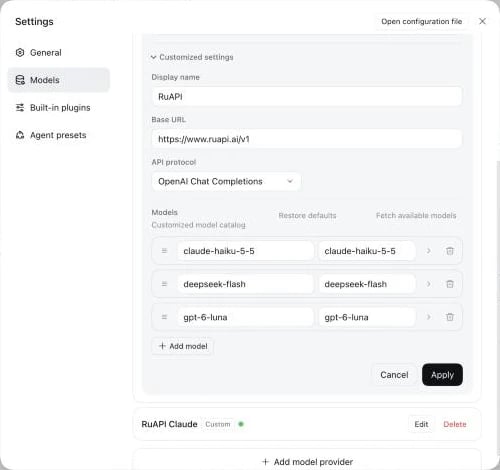
deepseek-flash, claude-haiku-5-5 and gpt-6-luna.
Step 4. First task
- New Session (top left).
- Click the model button at the bottom right of the input box and choose, for example,
deepseek-flash.
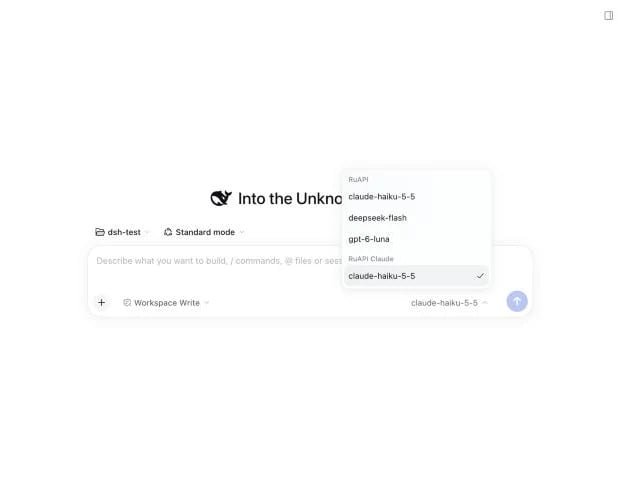
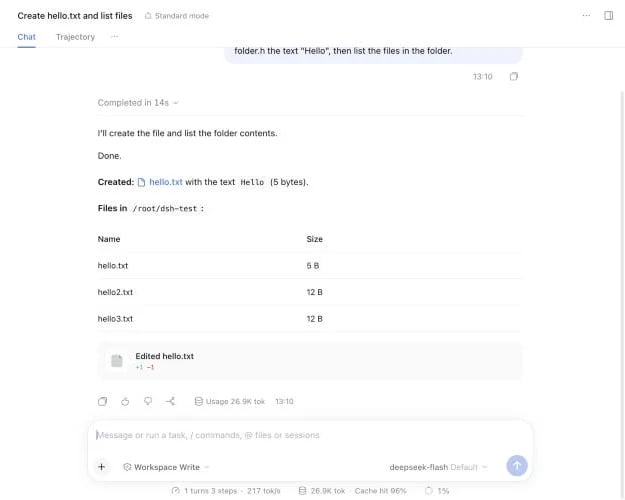
- Send a task, for example:
deepseek-flash did it in 9 seconds, claude-haiku-5-5 in 6, gpt-6-luna in 14.
Reasoning levels for deepseek-flash
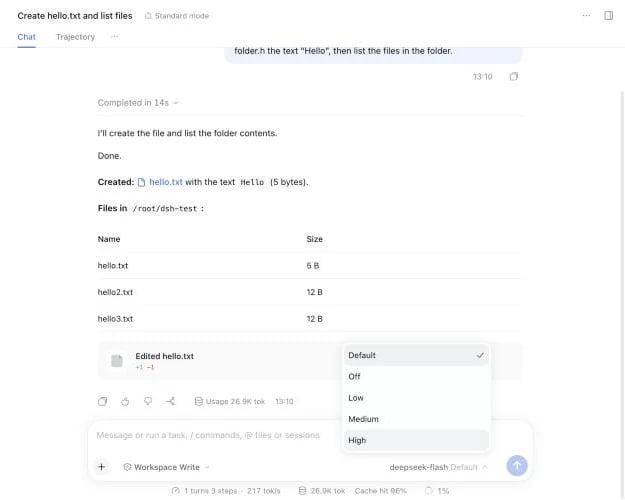
deepseek-flash thinks before answering by default. To switch levels right in the chat:
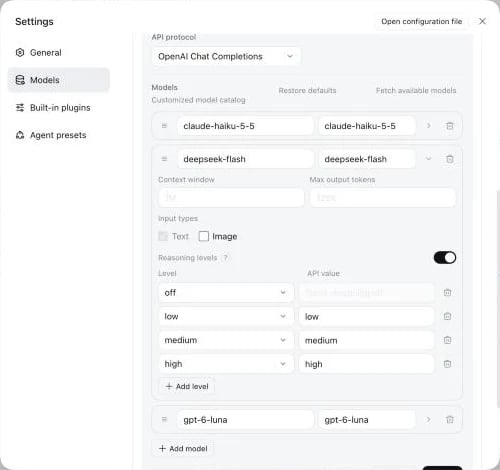
- Settings → Models → Edit next to RuAPI → Customized settings.
- Click the arrow next to
deepseek-flash→ turn on Reasoning levels (off / low / medium / high) → Apply.
~/.dsh/profiles/web/cordis.patch.yml (on Windows %USERPROFILE%\.dsh\profiles\web\cordis.patch.yml) and add two compat lines under name: deepseek-flash:
Ctrl+C) and run npx @deepseek-ai/dsh web again in the same window (in a new terminal, cd dsh-test first); the token in the address will be new.
In our test Off then answered in 3 seconds without thinking (before the change: 9 seconds, 3 of them thinking), and High in 6 seconds.
Claude via the native Anthropic format (optional)
Claude models already work through theruapi provider above. If you use Claude a lot, you can add a second provider with the native Anthropic protocol — prompt caching then kicks in one turn earlier.
Add model provider → Custom model API:
Fetch available models → tick the Claude models you need (for example
claude-haiku-5-5) → Update list → Create provider. They appear in the model menu under RuAPI Claude.
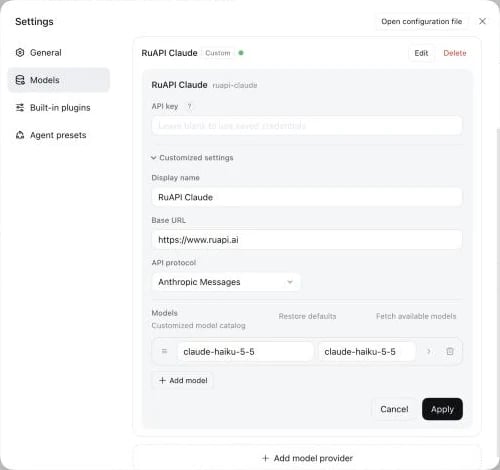
claude-haiku-5-5):
The only difference is the second turn of each session, so one
ruapi provider is enough for most people.
Costs
- On every step dsh sends the model its system prompt, tool definitions and history — 26–36K input tokens per step in our test.
- Most of that input usually comes from the cache (70–97% in our test; for Claude via the OpenAI format caching starts only from the third turn, see the table above), and cached tokens cost far less. More in Prompt caching.
- The cheapest model for dsh is
deepseek-flash. You can see the cost of every request in the RuAPI console → Usage Logs.
Common problems
dsh web authentication required
dsh web authentication required
The page was opened without the token. Copy the whole
http://127.0.0.1:3080/?token=... line from the terminal.dsh says it cannot create a default workspace
dsh says it cannot create a default workspace
Pick the folder yourself with the folder selector above the input box → your folder → Open.
npx complains about the Node.js version
npx complains about the Node.js version
You need Node.js 24.9 or newer. Check
node -v and update Node.js.Fetch available models returns 401
Fetch available models returns 401
The key is wrong or deleted. Check it in the RuAPI console and paste it again: Models → Edit → API key.
deepseek-flash thinks even on Off
deepseek-flash thinks even on Off
Add
compat: thinkingFormat: deepseek to the config file and restart dsh — see “Reasoning levels for deepseek-flash” above.“Try a trial model first…” when choosing another model
“Try a trial model first…” when choosing another model
Before the first top-up only the trial models work (
deepseek-flash, claude-haiku-5-5, gpt-6-luna). To unlock all models, top up your balance — USDT works, no foreign card needed.Security
- dsh stores your RuAPI key in the
~/.dshfolder on your computer. Do not share that folder. - A separate key for dsh is handy — you can delete it in the console if something goes wrong.
- dsh runs commands as your user. Do not run it in folders with important data, and do not give it tasks you are not ready to review.
Next
- Claude Code on DeepSeek — the same
deepseek-flashin Claude Code. - Hermes Agent — another agent that works with RuAPI.
- API error codes — if a request returns an error.